Powering my Home Office Using a Single $60 Solar Panel
As a PhD student, my day-to-day research often focuses on problems that arise when e.g., homes electrify or data centers strive to use more renewable energy.
Recently, I have been personally interested in a more hands-on experience with some of the energy technologies that I often think about in an abstract sense. This blog post summarizes my experience using DIY-friendly components to power most of my workspace at home.
The Plan
Inspired by the recent trend of vertical balcony solar in Europe, I planned my solar system around a single solar panel rated for 120W, a lithium-ion power station with a modest capacity to store any excess generation for use at other times, and a sufficiently long cable to provide flexibility in the panel mounting location while keeping the power station in a convenient place.
My partner and I live on the second floor of an old Victorian house in Northampton, MA. Over the years, as a previous owner subdivided the house into apartments, they left a small “bonus room” off the second-floor landing that I use as a home office. The space is isolated from the main apartment, so it isn’t effectively heated or cooled by our mini-split heat pumps.
Given the New England climate, I won’t realistically eliminate the need for an electric space heater in the deepest winter months, but I’ll plan to use my system to help manage temperature during the milder months. Right behind temperature management, the next major use of energy in my office is my desk setup, which includes a 27” monitor, keyboard, mouse, and my MacBook Pro – all of this will be primarily powered using my solar system.
Battery & Charge Controller
For this project, I picked the EcoFlow RIVER 2 power station with a nameplate capacity of 256 Wh. This product is far from cutting edge, but I managed to pick one up during a Black Friday sale for a good price. There are options that have more storage capacity for the same price, but note that products from established brands often have things like connectivity, app control, and features that help automate the whole system once it’s complete.
In a solar-focused application such as mine, the most important detail about your power station to take note of is the specifications of the supported solar input. For instance, the RIVER 2 accepts solar input with a voltage of 11-30V, and a maximum of 8 amps and/or 110W. EcoFlow themselves note that the RIVER 2 works with slightly over-sized panels (e.g., my panel is rated for 120W), simply curtailing generation over 110W. Since I don’t expect to get maximum output out of my panel very often, strategically over-sizing my panel slightly will increase my average generation on non-peak days.
Besides the solar input, my RIVER 2 supports USB-C Power Delivery output at up to 60W, DC output in a 12V car-style connector at up to 60W, and AC output at up to 300W. EcoFlow has something they call “X-Boost” that allows “600W” of output for resistive loads (such as small space heaters), but note that this is accomplished by undervolting the AC inverter to 60V, so the effective output is still 300W. Since I don’t have a good use for the 12V car-style connector, I added an adapter from my car that added another USB-C Power Delivery output port.
Mounting the Panel
While I went with an established brand for the power station, I bought my solar panel off of AliExpress, which set me back $60.20 (USD) for a 120W rated flexible panel.1
As a renter, my primary constraint is the limited set of mounting options at my disposal – anything permanent is off the table. For this reason, I looked for a solar panel that included several grommets for flexible mounting, and planned to route cables through an existing exterior wall opening, such as a window.
Fortunately, the exterior casing of the windows in my apartment includes permanent hooks above either side of the window, along with a loop at the bottom center – based on the geometry of these mounting points, I used 550 paracord to hang and anchor the panel.
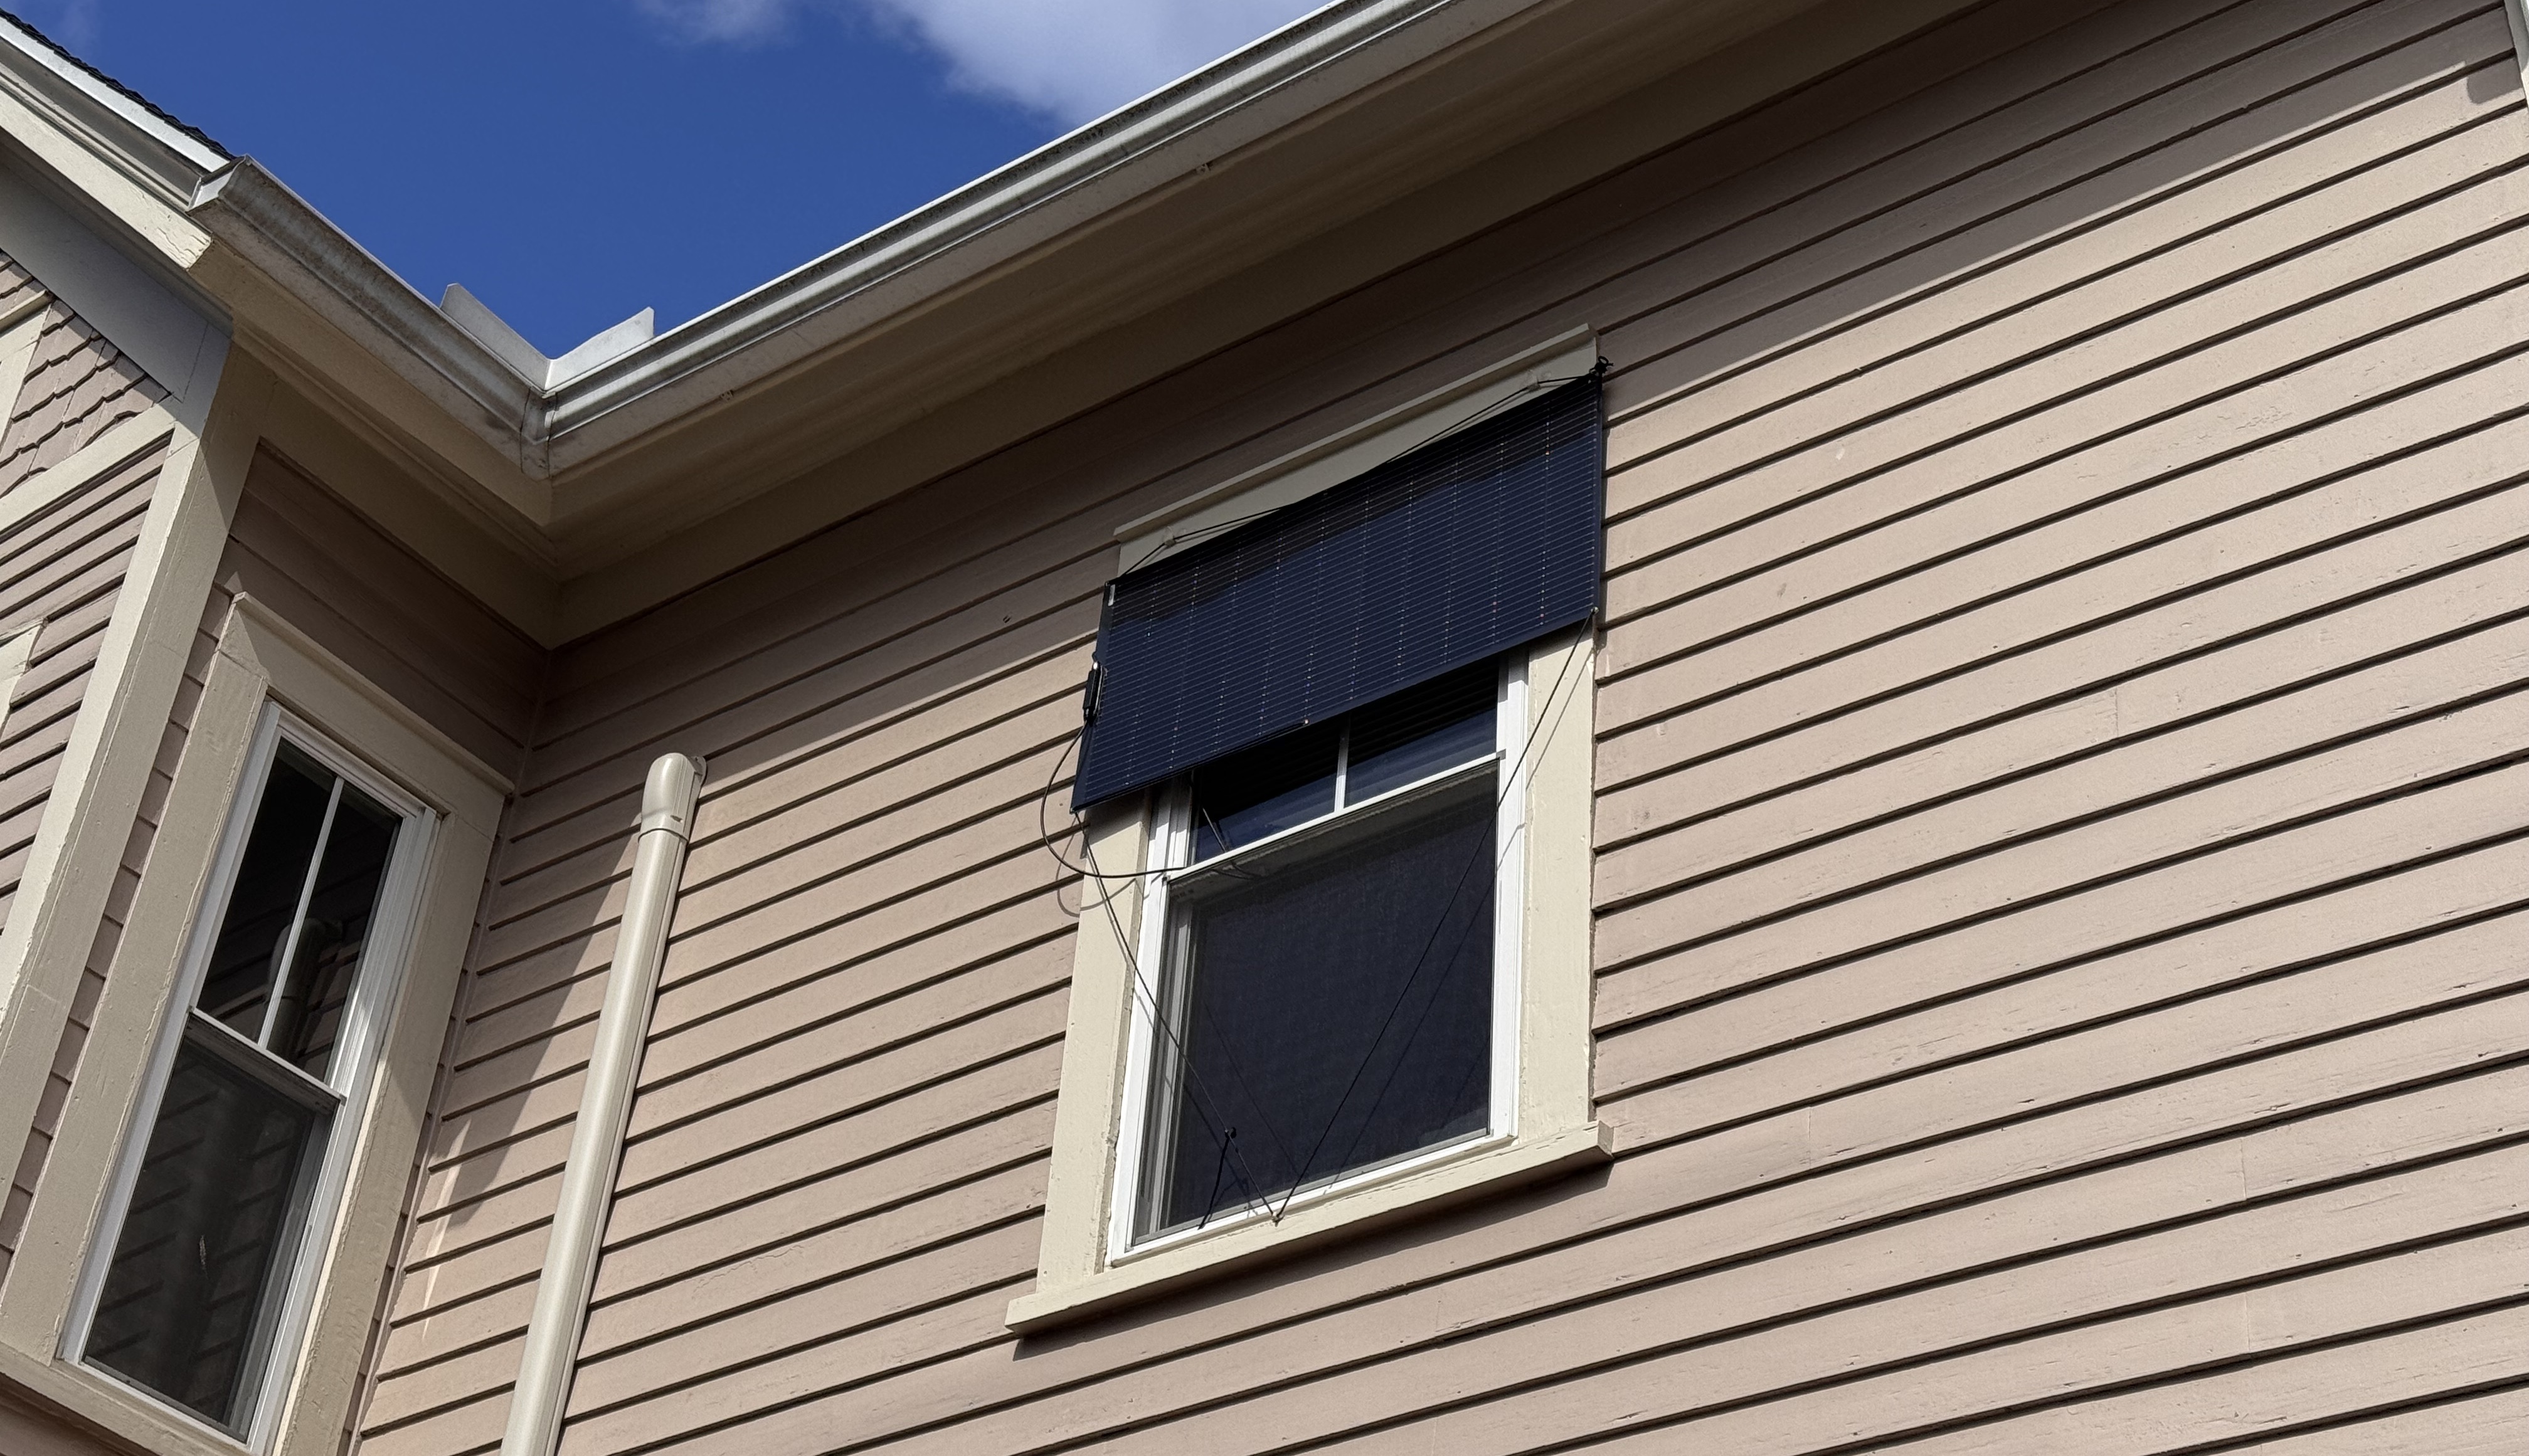
I found that the bottom anchor was important to keep the panel from “flapping” due to wind – since adding the anchor, this mounting solution has survived several storms without any significant unwanted movement.
The window that I mounted my panel to is a south-facing window that gets the best sustained and direct sunlight in my apartment, particularly in the morning hours.2 This placement is important, especially for vertically mounted panels that already have a suboptimal tilt angle – the sunlight’s direction (i.e., azimuth) will seriously impact energy generation.
Connection Challenges
Unfortunately, the window I mentioned above is not very close to my home office – see the floor plan below.
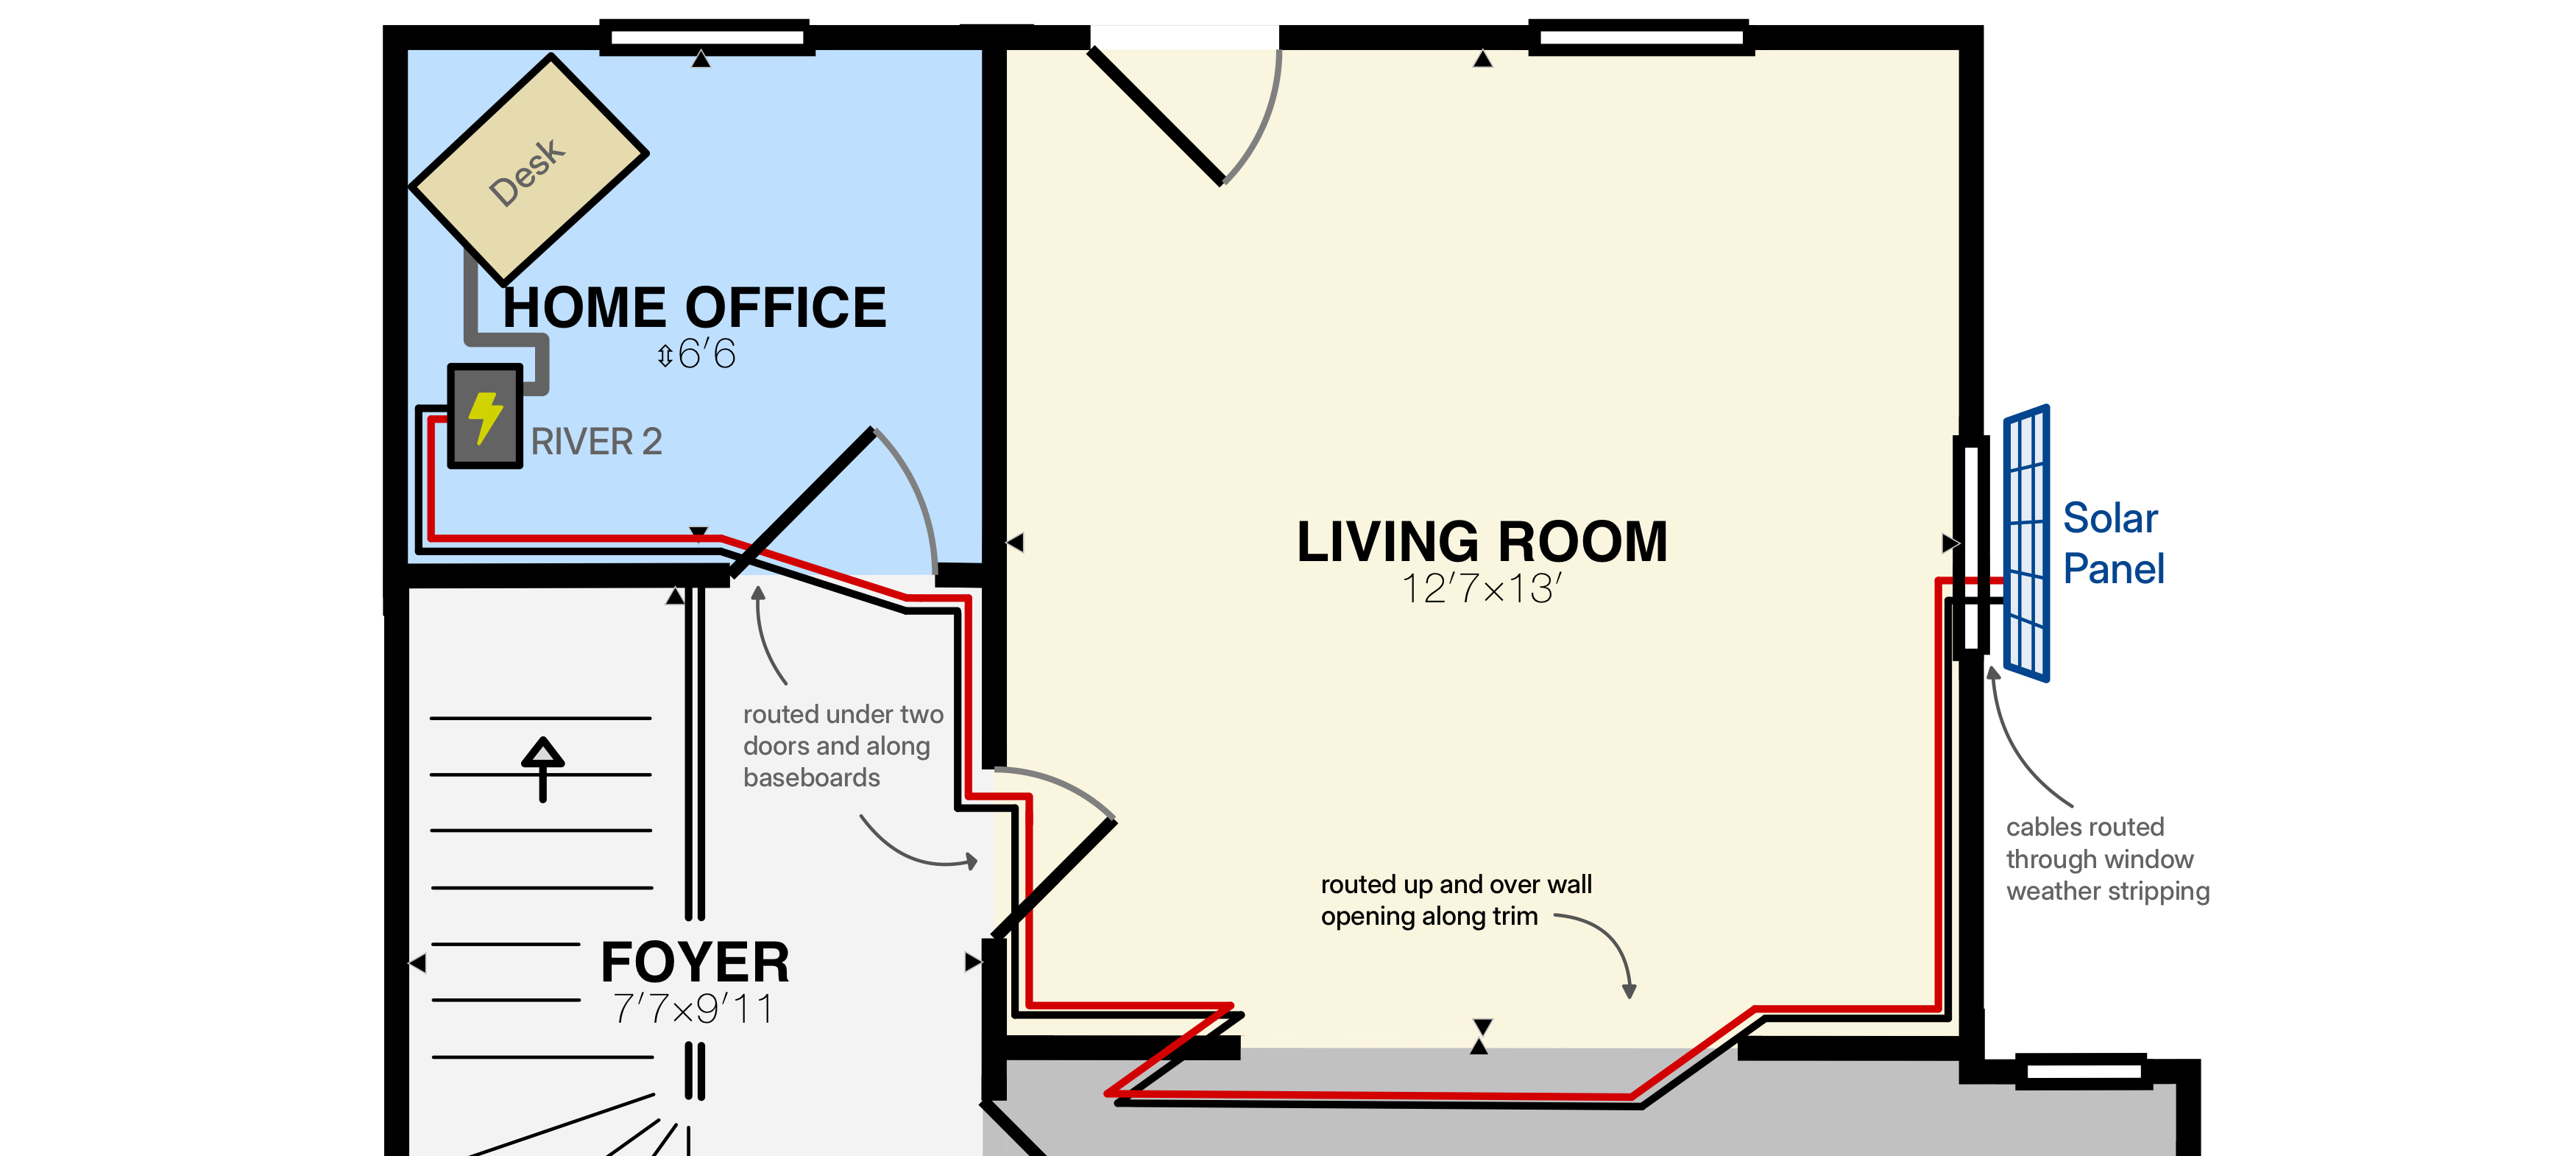
To address this, I purchased a long 50 foot cable with solar connectors on one end and the XT60 plug the RIVER 2 is expecting on the other end.
I picked this length so that I could route the cable down from the window, along the baseboards to the wall separating the living room from the dining room, up and over the doorway, back down to the baseboards and under the secondary unused door in the living room, which is just outside the entrance to my home office.
Long cable runs such as this one can introduce enough resistance to hurt energy generation – at the current levels induced by a single panel, I did not see a noticeable difference, but note that this may be an issue, particularly for multiple panels connected in parallel. Lower gauge wires are your friend in that case.
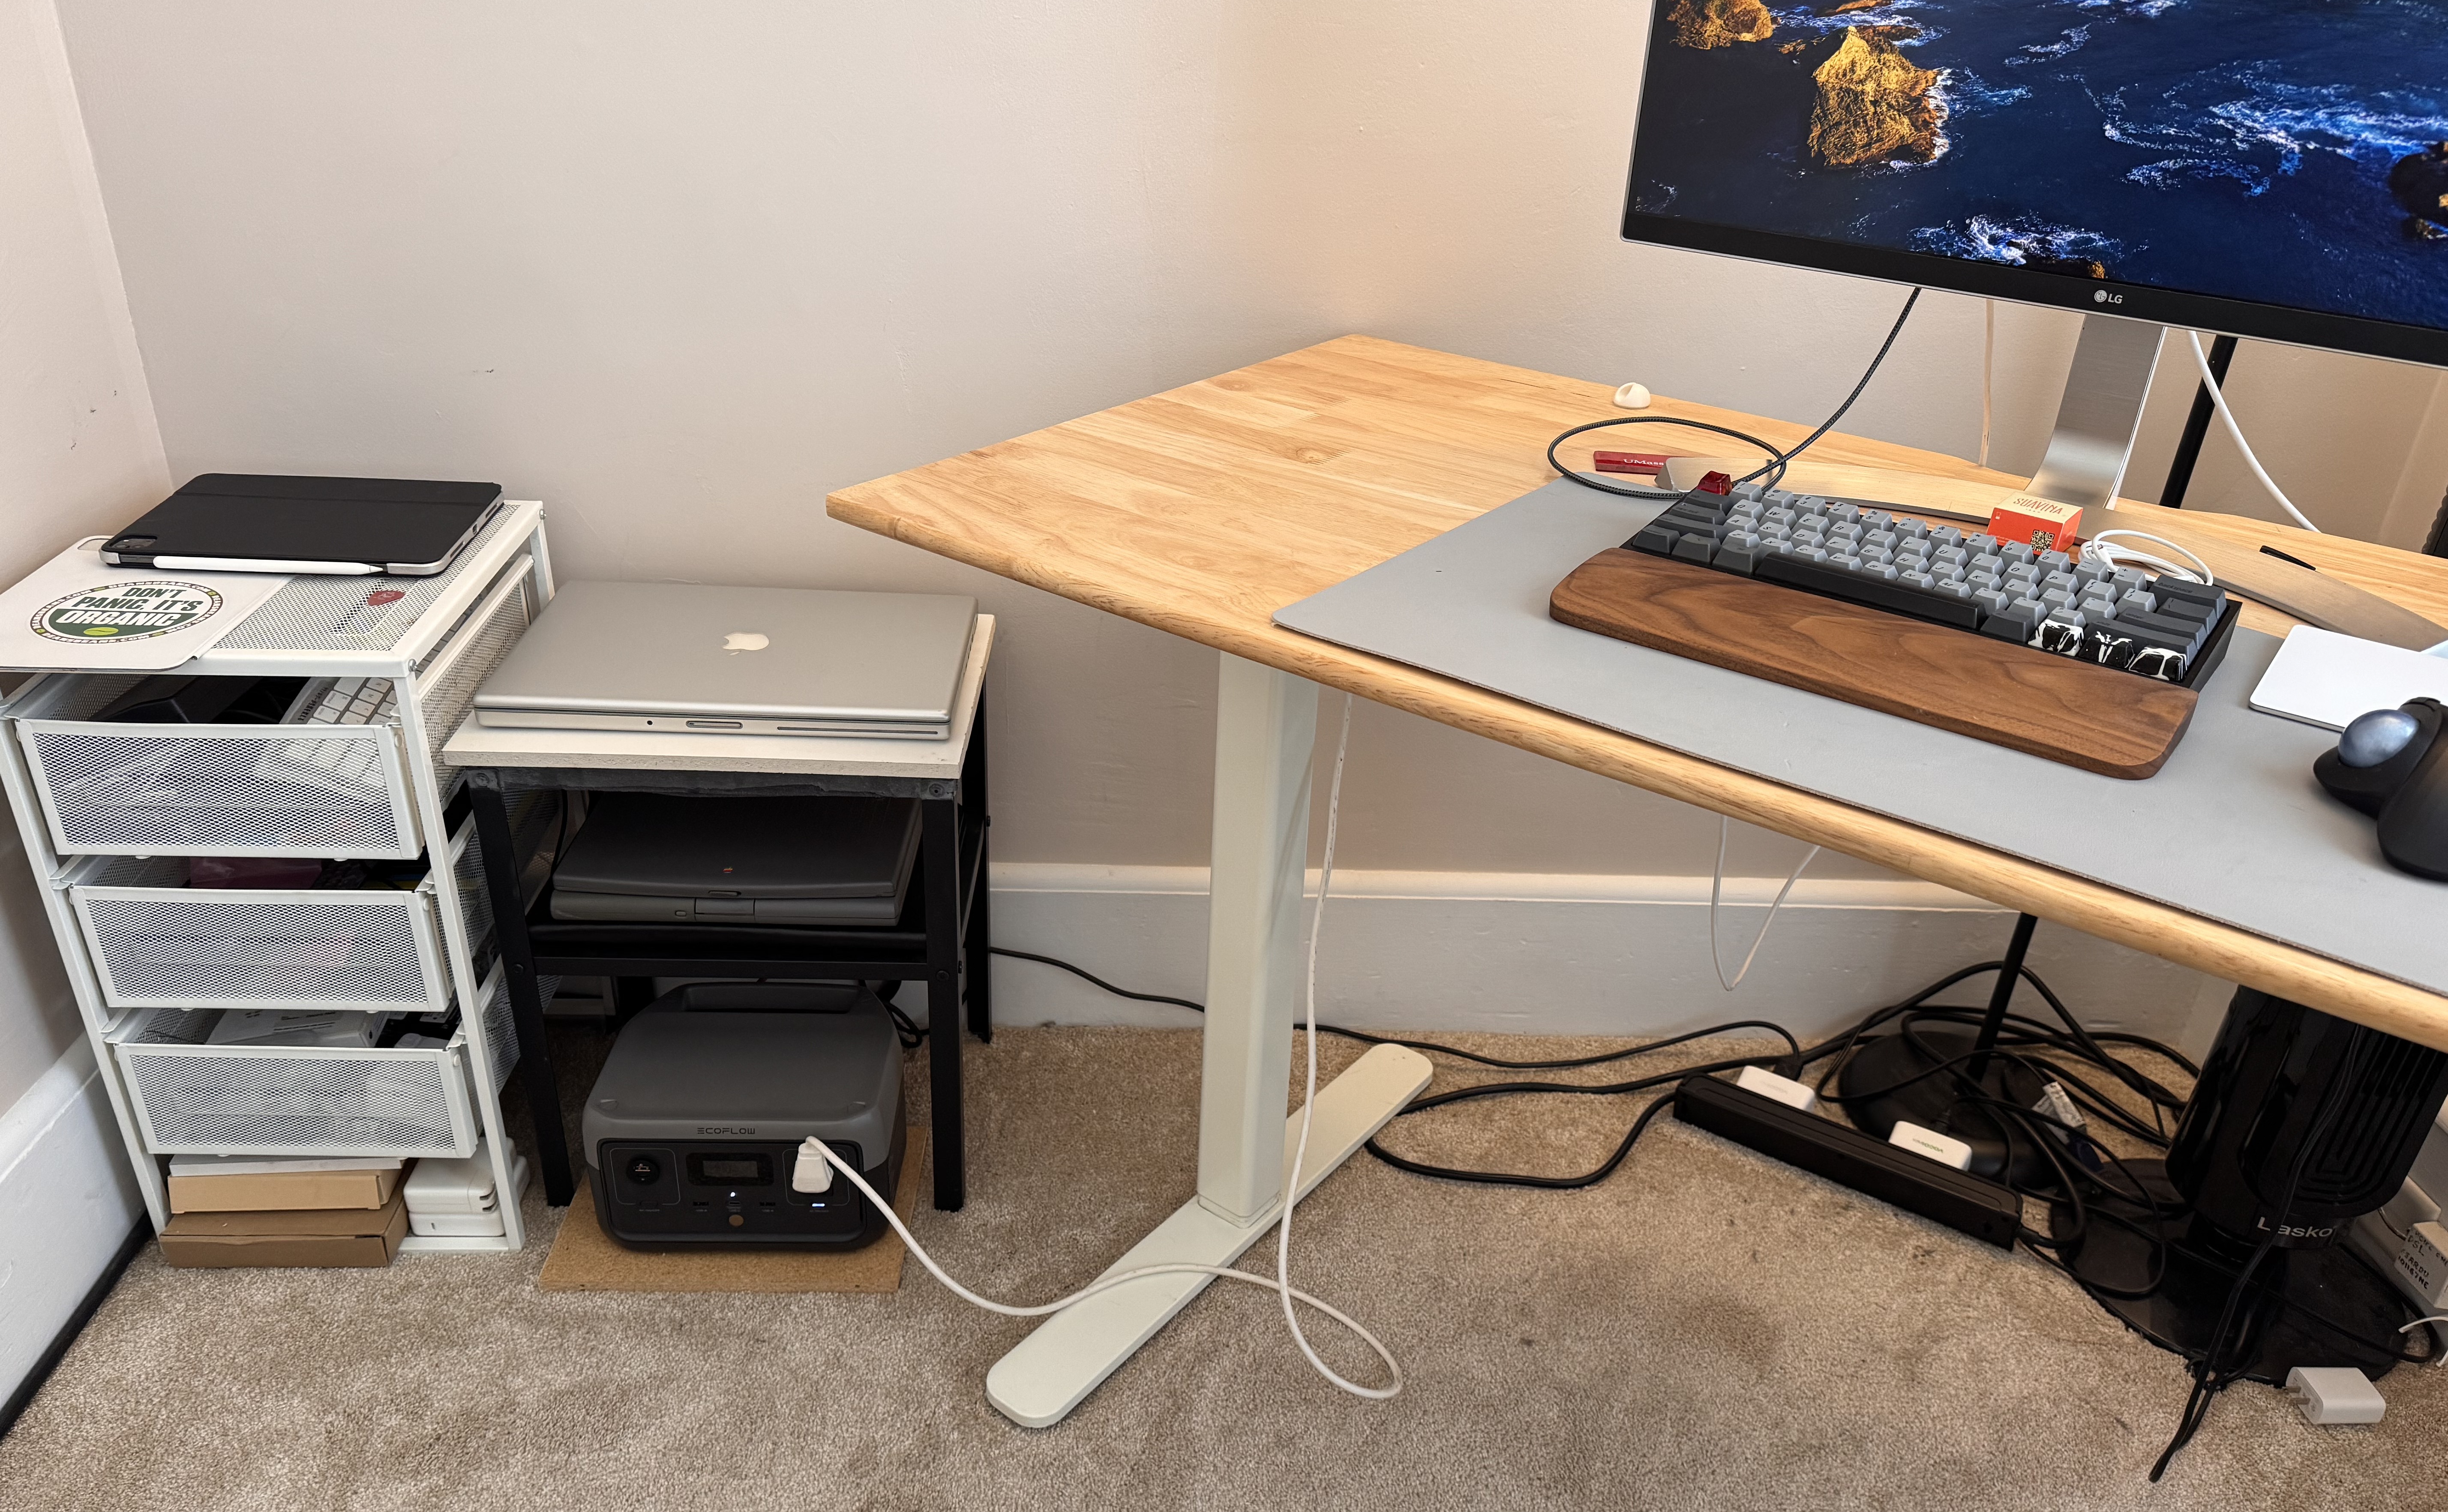
Final Setup
Once I had the panel mounted and the cable routed almost into my office, I hooked up the RIVER 2 in a semi-permanent location next to my desk. I connected my LG monitor directly to the AC output of the RIVER 2, relying on the monitor’s passthrough power for my MacBook. I also connected the RIVER 2 to a regular power outlet for backup purposes, using software features (see the next section) to prevent it from pulling grid electricity unless needed.
Software Configuration and Observations
In EcoFlow’s app, the RIVER 2 (and presumably other EcoFlow products) includes a “Backup reserve” configuration feature which allows the power station to selectively charge from solar and other sources.
In my configuration, I set a reserve level of 20%. This means that when the RIVER 2 is below at 20% charge, the RIVER 2 pulls from the wall input until it is charged to 20%. Above 20%, the reserve feature only allows charging using solar.
This makes the whole experience pretty seamless – if there’s a string of cloudy days, my whole setup automatically falls back onto the AC passthrough of the power station. Otherwise, the solar input charges the battery whenever sunlight is available, and that energy is always prioritized (i.e., used first) whenever I start using my computer at my desk.
Conclusions
While it’s not going to make a meaningful impact on my electric bill, I’ve been extremely happy with the outcome of this project. Anecdotally, on most days that I work from home, I can power my entire setup for a full workday, including auxiliary devices such as a heating pad for colder days. Owing to my work and interests, the fine-grained insights into intermittency and related renewable challenges have been extremely interesting.
My total cost for this project is outlined below. Prices may change as deals/tariffs/promotions come and go.
| Component | Price (USD, as of Jan. 2025) |
|---|---|
| EcoFlow RIVER 2 Power Station | $168.00 |
| 120W Flexible Solar Panel | $60.20 |
| 50ft Solar to XT60 Cable | $57.52 |
| 550 Paracord (50 ft) | $5.12 |
| 12V Car USB-C adapter | $13.80 |
| Total | $304.64 |
-
By the time you are reading this, the link to the AliExpress solar panel I bought may not work – if so, I’ll note that there isn’t anything particularly special about the panel I bought, and any generic alternative should work equally well. ↩
-
The window location I picked for mounting exhibited the best energy generation during the winter months of Jan-Feb – it’s likely that a different angle/location would be better during other seasons. At the time of writing, I haven’t evaluated this yet, but I expect I’ll have to at least adjust the tilt angle for the higher summer sun. ↩